CPRifle Sling Review
Posted in New Kit, PRS Series, Training on February 9th, 2018 by Preston LewisAsk any shooter about their sling of choice and you will quickly find that they haven’t put as much thought in a sling as they have into other shooting or gun accessories. I have been guilty of this very thing myself. Brian from Colorado Precision Rifle sent us his own personally designed sling to demo. Brian is an accomplished U.S. Army Veteran Sniper & Sniper Instructor as well as a very talented Precision Rifle Shooter so he set out to design a sling to accommodate the long range precision rifle shooter. Right out of the box, the sling allows you to choose your attachments whether it be QD sling swivels, HK Clips etc. We went with the QD swivels to attach to our MDT TAC21 Chassis. The CPRifle Sling is such a simple design and also has several different ways to incorporate it in different styles of shooting. Before this sling came along, all I ever used a sling for is to carry my rifle from stage to stage not knowing that a sling like this existed to help me through a stage sort of like my shooting bags do. With match directors incorporating more and more challenging courses of fire, competitors are looking for ways to ease the burden of a stage and this sling does exactly that. This two point sling has changed my way of thinking. Not only is the sling a weapon transport device but also a stabilization device used in positional shooting. PRS shooting has exploited the whole idea of the CPRifle Sling and could also be used in combat, as well as hunting applications.
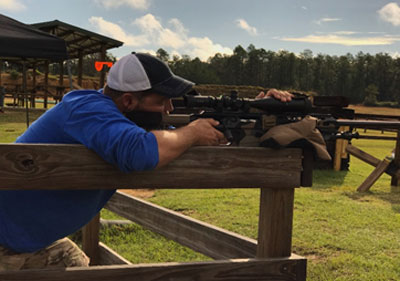
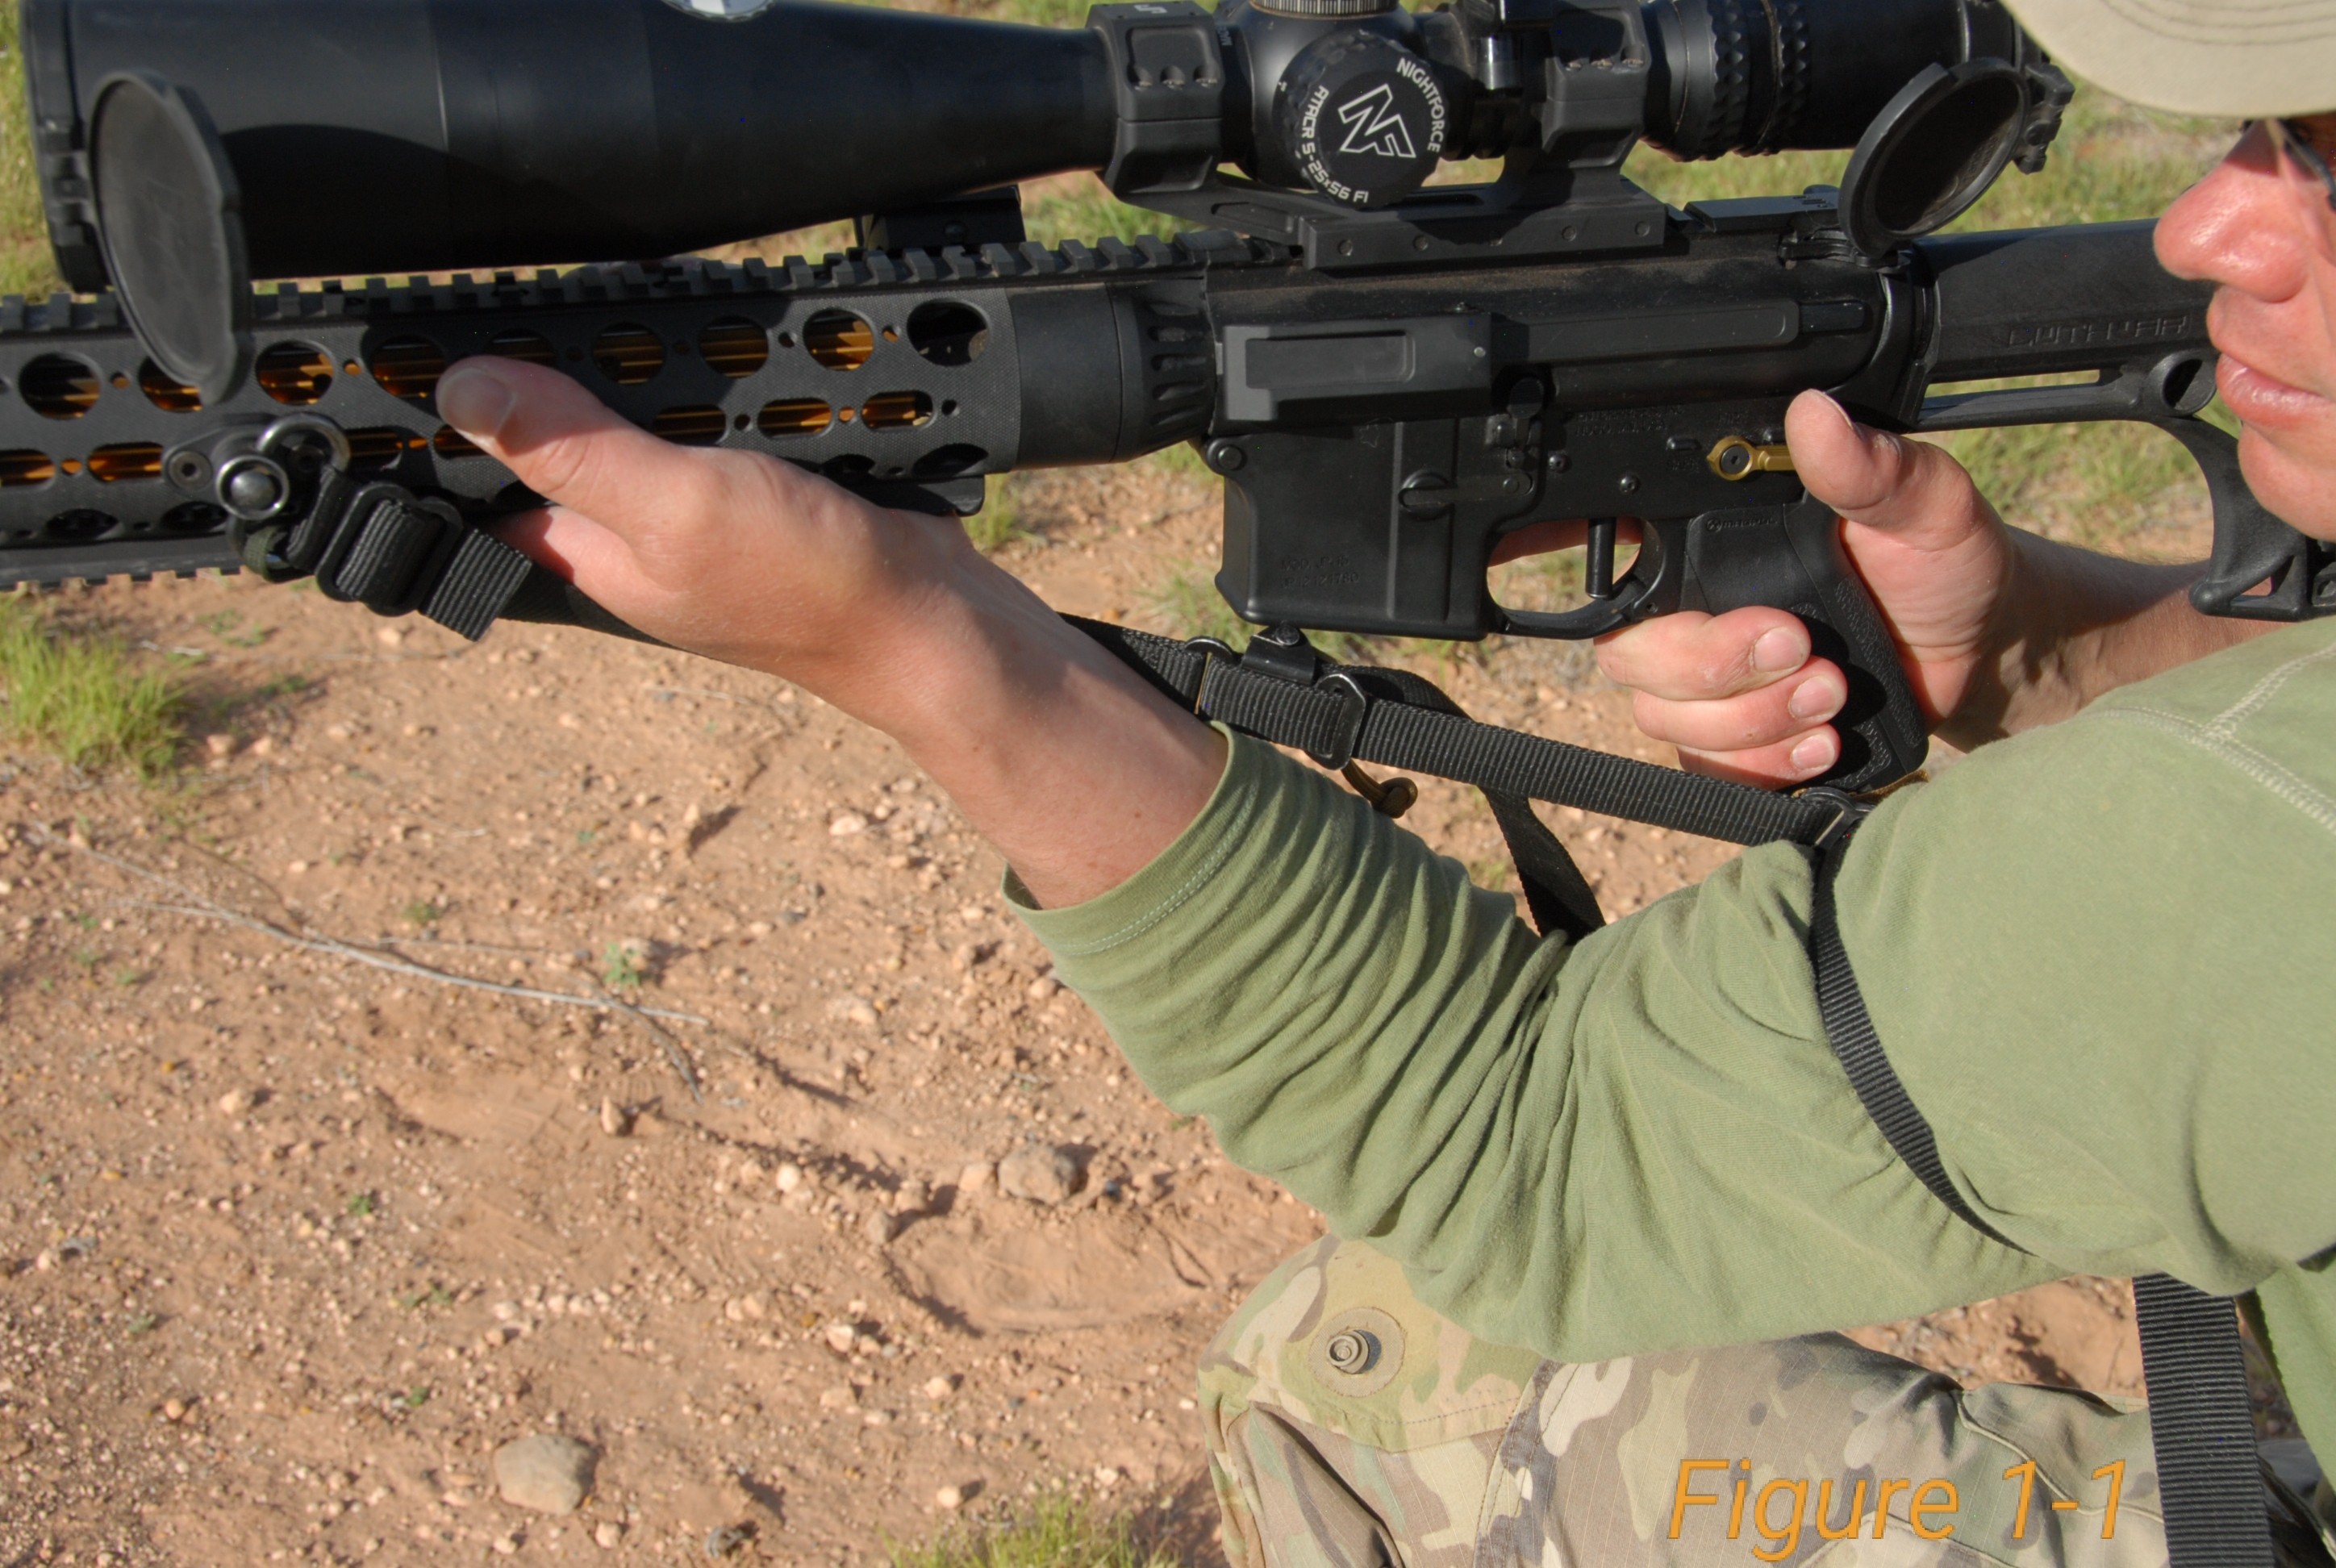
We took the sling out to use it in a team match and the first thing I noticed was how easy the sling is to get in to. Everything on the sling slides easy and is accessible while wearing it so you shouldn’t have any issues finding anything. The best part about it is that it has an integrated arm cuff. I used the sling when shooting out of a car window to push the rifle against the door and could not believe the stability that it created. There was little to no wobble of the gun and I hit every target in that stage. What this cuff does for you is very valuable. It incorporates an arm cuff shown below in Figure 1-1 and what this does is pushes the rifle into your shoulder or depending on which way you are exerting pressure, you can push the gun forward into a barricade creating a more stable shooting position.
This can be done sitting, kneeling, or standing as we all know what NOT to expect in PRS matches. In PRS matches, most of the time, you will have a 2 minute course of fire so having a sling that is easy to work with is pertinent.
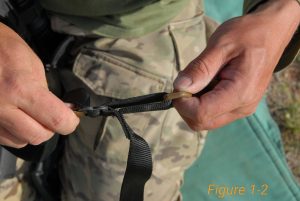
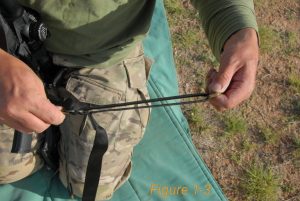
Setting up the arm cuff is very easy to do as shown in Figure 1-2 and 1-3.
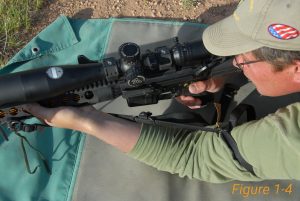
For right handed shooters, simply insert your left arm into the cuff, move the cuff up to your bicep and simply grab the D-loop and cinch it down until you are stable shown in Figure 1-4.
Another feature the sling boasts is a steel cam buckle to adjust the length of the sling on the fly quickly as seen in Figure 1-5.
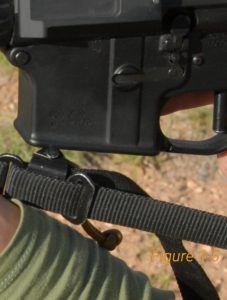
The cam buckle comes with 550 cord attached so all you have to do is grab and pull. The Colorado Precision Rifle Sling is a must have in your PRS or tactical tool box. It makes practical sense to use one no matter what you are shooting at. It is made out of high strength material and most importantly, made in the USA by a great company. I plan on continuing to test it on many different applications out in the field. My advice is, you won’t be sorry your bought this sling, it is a must have accessory!!
As Always, See you at the range!!
Preston Lewis
Team Tactical Works, Inc.