AICS Rifleman Mag Carrier

Posted in New Kit on June 17th, 2020 by KrowRN

The perfect collaboration for the perfect Mag Carrier. Tactical Works and Ivory Holsters have teamed up to bring you the best hand-built custom Kydex Mag Carrier for your AICS pattern magazines, The Rifleman Mag Carrier.

When we wanted to create a mag pouch for our Long Range and PRS guys we knew exactly who to reach out to. Ivory Holsters build their products by hand and are known for their fanatical attention to detail and the new Rifleman Mag Carrier is no exception. Built around AICS pattern short action magazines using a Blade-Tech Tek-Lok belt attachment and integrating an MRD (manual retention device) for front to back tension adjustment, the results are the best custom hand-built Kydex Mag Carrier for your AICS pattern short action magazines.

Features include:

• Constructed with 0.080″ thick Kydex

• Blade Teck Tek-Lok belt attachment. Adjustable for belt width from 1.5″ to 2.25″. Double locking mechanism so no slipping or twisting.

• Mounting holes on both sides of carrier so can be used ambidextrously

• MRD (Manual Retention Device) for adjusting front to back tension to fit a variety of magazines

• Fits most short action 10 round AICS pattern magazines: Accuracy International, Accurate Mag, MDT polymer and metal, Magpul

• Weighs just under 4 ounces. Measures 4 1/4″ x 3″ x 1 1/4″

• 1/8″ Allen Key included for MRD adjustment

Made by hand in the USA

Tags: , , ,

Tikka T3 Bolt Handles & Bolt Shrouds by Sterk Shooting

Posted in New Kit, TikkaT3 on June 27th, 2018 by KrowRN

Tikka T3 owners, if you are looking to upgrade your rifle with parts that offer a superior fit and finish, look no further. You are going to want to get your hands on a Sterk Shooting bolt handle and bolt shroud. Manufactured in Australia with painstaking care in small batches and now available at Tactical Works, Inc. Each handle and shroud are tested on 2 Tikka bolts after they are CNC’d to track tolerances and any tool wear. Each bolt handle is bent by hand and then hand polished, even if it gets Cerakoted, to remove all machine marks.

The bolt handles are available in Swept Ball, Pineapple, and Grooved style.  The shrouds are available in 2 styles: Gen1 and the new Gen2 “Wasp”.

The Swept Ball are a CNC machined Stainless shaft and Aluminum ball, cerakoted black. These weigh in at 49.2 grams compared to the factory handle at 41 grams.

The Pineapple and Grooved handles and the Bolt Shrouds are CNC machined Titanium available raw/polished or cerakoted black. The Pineapple handle weighs just 42.8 grams and the Grooved weighs 44.6 grams. The Gen1 Shroud weighs 26.43 grams and the Gen2 Shroud weighs 22 grams.

An easy, quick way to upgrade your Tikka T3 rifle with superior parts!


Tags: , , , ,

CPRifle Sling Review

Posted in New Kit, PRS Series, Training on February 9th, 2018 by Preston Lewis

Ask any shooter about their sling of choice and you will quickly find that they haven’t put as much thought in a sling as they have into other shooting or gun accessories. I have been guilty of this very thing myself. Brian from Colorado Precision Rifle sent us his own personally designed sling to demo. Brian is an accomplished U.S. Army Veteran Sniper & Sniper Instructor as well as a very talented Precision Rifle Shooter so he set out to design a sling to accommodate the long range precision rifle shooter. Right out of the box, the sling allows you to choose your attachments whether it be QD sling swivels, HK Clips etc. We went with the QD swivels to attach to our MDT TAC21 Chassis. The CPRifle Sling is such a simple design and also has several different ways to incorporate it in different styles of shooting. Before this sling came along, all I ever used a sling for is to carry my rifle from stage to stage not knowing that a sling like this existed to help me through a stage sort of like my shooting bags do. With match directors incorporating more and more challenging courses of fire, competitors are looking for ways to ease the burden of a stage and this sling does exactly that. This two point sling has changed my way of thinking. Not only is the sling a weapon transport device but also a stabilization device used in positional shooting. PRS shooting has exploited the whole idea of the CPRifle Sling and could also be used in combat, as well as hunting applications.

We took the sling out to use it in a team match and the first thing I noticed was how easy the sling is to get in to. Everything on the sling slides easy and is accessible while wearing it so you shouldn’t have any issues finding anything. The best part about it is that it has an integrated arm cuff. I used the sling when shooting out of a car window to push the rifle against the door and could not believe the stability that it created. There was little to no wobble of the gun and I hit every target in that stage. What this cuff does for you is very valuable. It incorporates an arm cuff shown below in Figure 1-1 and what this does is pushes the rifle into your shoulder or depending on which way you are exerting pressure, you can push the gun forward into a barricade creating a more stable shooting position.

Arm Cuff on CPRifle Sling

This can be done sitting, kneeling, or standing as we all know what NOT to expect in PRS matches. In PRS matches, most of the time, you will have a 2 minute course of fire so having a sling that is easy to work with is pertinent.

Setting up the arm cuff is very easy to do as shown in Figure 1-2 and 1-3.

CPRifle Sling

CPRifle Sling

For right handed shooters, simply insert your left arm into the cuff, move the cuff up to your bicep and simply grab the D-loop and cinch it down until you are stable shown in Figure 1-4.

CPRifle Sling

Another feature the sling boasts is a steel cam buckle to adjust the length of the sling on the fly quickly as seen in Figure 1-5.

CPRifle Slint

The cam buckle comes with 550 cord attached so all you have to do is grab and pull. The Colorado Precision Rifle Sling is a must have in your PRS or tactical tool box. It makes practical sense to use one no matter what you are shooting at. It is made out of high strength material and most importantly, made in the USA by a great company.  I plan on continuing to test it on many different applications out in the field. My advice is, you won’t be sorry your bought this sling, it is a must have accessory!!

As Always, See you at the range!!

Preston Lewis

Team Tactical Works, Inc.

**photos courtesy of Brian @ CPRifle
Tags: , , , , , ,

Installing the Savage Improved Extractor Kit

Posted in DIY, New Kit, Product Reviews, Savage on December 1st, 2017 by Preston Lewis

WARNING

Warning!

Before starting work on any firearm be sure that the firearm is clear. Do not touch the trigger until the firearm has been cleared. Inspect the chamber to ensure that it is clear of ammunition and that there is no ammunition positioned to be chambered. Do not keep live ammunition near your workspace. Once you have checked the firearm, check it again!

Tactical Works, Inc. takes no responsibility for the accuracy and/or safety of this “how to”.  This post is simply for your reading enjoyment. Before shooting any firearm have it inspected by a qualified gunsmith.


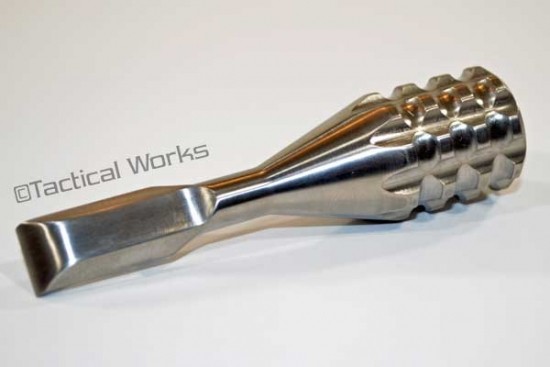
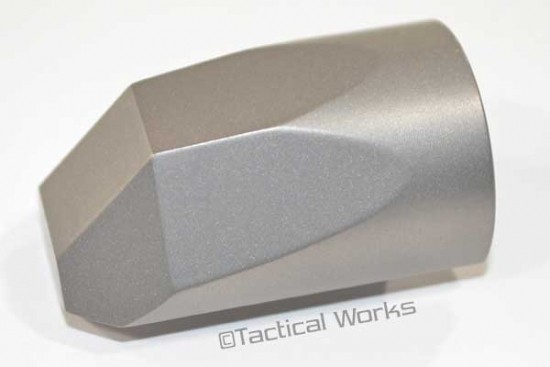
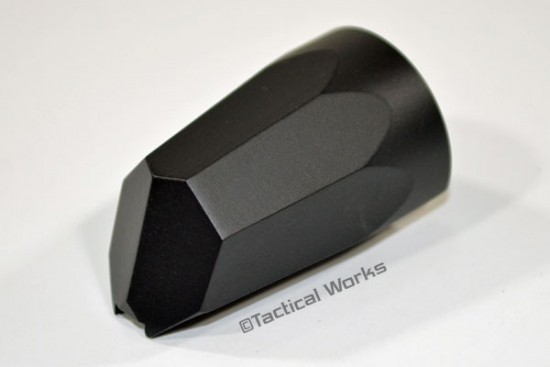
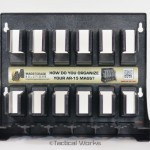
In this Do-It-Yourself Tutorial, we will be installing the Savage Improved Extractor Kit.

List of tools you need to accomplish this installation successfully.

  • Clean Workspace
  • Tweezers
  • 1/6″ punch
  • Small mallet
  • Small flathead screwdriver
  • Compressed air or canned air
  • 4″ piece of packing tape
  • Gun oil
  • Good set of eyes (joking but for real!)

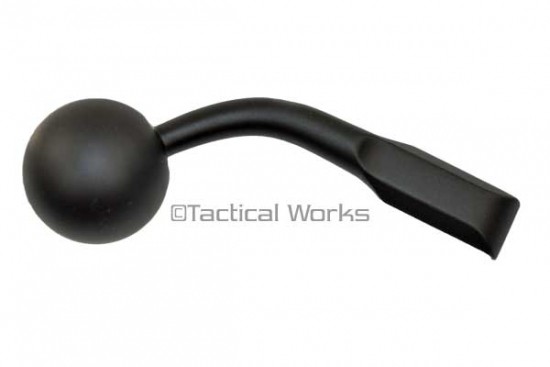
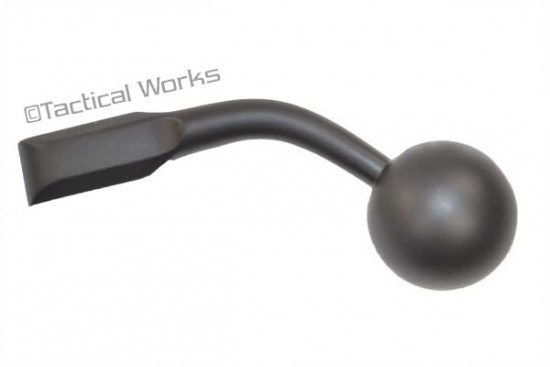
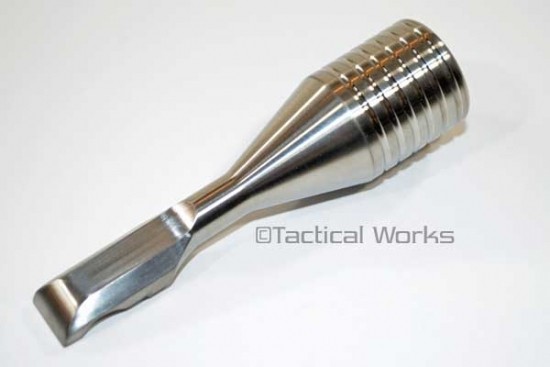
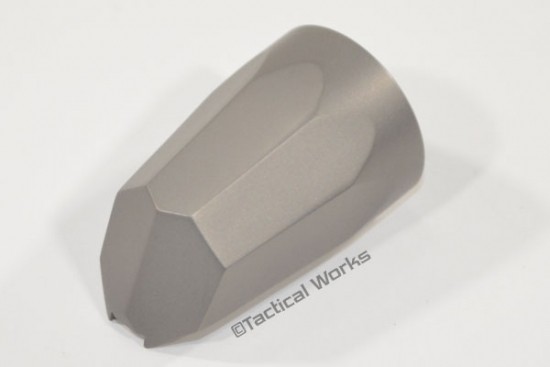
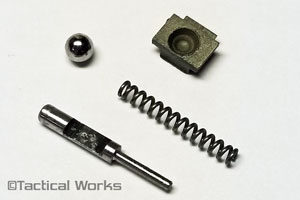
This kit consists of a modified extractor, larger extractor detent ball, and custom ejector and ejector spring.

*Some of the installation pictures show the original kit parts. The new kit parts (pictured above) may look slightly different but the installation steps are the same.

Step 1: Remove the bolt from your rifle.

Step 2: In this step, we will be removing the OEM Extractor from the bolt head. Take your flathead screwdriver (make sure it is small enough to fit in the slot in front of the extractor) and place it flat against the extractor. With a small amount of pressure, push the extractor toward the outside of the bolt face as shown in Figure 2-1.  Make sure while you are pushing the extractor that you keep a hand over the bolt face because the detent ball underneath the extractor will shoot out if you’re not careful.  See Figure 2-2.


Step 3: Once the extractor is clear of the bolt and the detent ball is captured, use your tweezers to pull the spring out of the blind hole. See Figure 3.1. Lay the OEM extractor and detent ball on the piece of tape as shown in Figure 3.2. Lay the spring to the side as you will reuse it with the new extractor. Figure 3.3.


Step 4: Once the spring is removed from the blind hole, take your air compressor or canned air and blow the blind hole out to get any residual dirt, dust or grime out. Apply a few drops of gun oil into the hole as well as on the spring and place the spring back into the blind hole (either direction, doesn’t matter). See Figure 4.1. 


Step 5: Place the new (larger) detent ball on top of the spring. It should sit on the spring sticking out above the bolt face. See Figure 5.1. 


Step 6: In Figure 6.1, notice the new extractor plate. The detent ball indention faces the bolt and the extractor lip faces the inside of the bolt face.


Step 7: Slide the new extractor into the slots in the bolt head until it contacts the detent ball as shown in Figure 7.1. Use your small flathead screwdriver and carefully push the detent ball down below the surface of the bolt face and slide the extractor plate in over the detent ball simultaneously. You will hear it snap into place. See Figure 7.2.


Step 8: Look for the ejector pin hole on the opposite side of the bolt as the extractor. This pin only comes out one way and only goes in one way. You will see an inlet on the top of the bolt head. This is the side where you will insert your punch. See Figures 8.1 and 8.2 for pin removal direction. Use your 1/16″ punch and insert it into the hole. Lightly tap the pin out of the bolt head until the pin is clear of the bolt head. Cup your hand over the bolt face and pull the punch out in the opposite direction.

Note*** Be sure that you capture the ejector rod and spring when you extract the punch as it is under pressure and will projectile if your hand is not over the face of the bolt.


Step 9:  Again, use your air compressor or canned air to blow out the ejector rod hole making sure to get any trash or sand out. Apply a few drops of gun oil into the hole and the new ejector spring as shown in Figure 9.1.


Step 10: Install the new ejector spring onto the new ejector rod. If you look at the ejector rod (as shown in Figure 10.1) there is a slot cut out on one side of the rod. Position the “cutout” facing toward the small extractor retention pin. Once you have the cutout in the ejector positioned correctly toward the pin, insert the ejector and spring into the blind hole.


Step 11: This next step is a little tricky…. Use your thumb to depress the ejector into the hole while simultaneously pushing the pin into the retention hole. Remember that the pin can only be inserted one way. See Figure 11.1.


Step 12: Once the pin is in place, push the ejector down a few times to make sure that is functions correctly and doesn’t bind. See Figure 12.1


Step 13: Install the bolt back into the action and cycle it forward and back. Hand feed an EMPTY case into the chamber and close the bolt. Cycle the bolt. Cycle the bolt rearward and make sure that the case ejects and kicks away from the gun. If this is successful, YOU ARE FINISHED!

**Note: Sometimes with installation you will find your bolt is hard to close. With the new parts being all stainless steel they are stiffer and may need some help mating up and breaking in. If you experience this problem you will need to place an EMPTY CASE in the chamber and slam your bolt. You may have to work your bolt to loosen it and may need to cycle it as above several times (sometimes upwards of 100 times). Then you should be good to go. As always just call or email us with any questions or concerns.

The Savage Improved Extractor Kit is a great upgrade to your Savage 10/110 and Savage Axis rifle. With this kit, you won’t have to worry about hung cases or failure to extract anymore. And it will kick the cases further away from the gun. 

You’ll be glad you spent the time to install this kit. It really adds a piece of mind knowing that your rifle is going to eject without a doubt whenever, wherever.

As always,

See you on the range!!

Preston

Tags: , ,

Crosstac Saddle Bag Review

Posted in New Kit, Product Reviews on October 13th, 2017 by Preston Lewis


When I received the Original gen1 Crosstac Saddle Bag, I was very impressed with the quality and workmanship in this shooting bag. I was looking for a bag that can be used on pretty much any barricade that PRS match directors can throw at you. I have always been a comfortable shooter that carried different bags around with me in a match to suit different barricades (rear bag, strap on bag etc.) until the Crosstac saddle bag showed up on my doorstep. The first thing I did with this bag was set it on a railing to see how it would support my gun by itself. To give you an idea, I shoot a 6.5 Creedmoor on an MDT TAC21 chassis with a 24 in barrel (12.4 lbs) and I can lay this weapon system on the bag and simply let go of it. With that being said, long range precision shooters dream about having a bag that will steady a gun like this. The first time I used it, I shot out to 1020 yards 5x with no misses.

Crosstac Saddle Bag


Lisa called me and asked if I would try out the new Crosstac Gen2 Ultralight Saddle Bag. The item showed up and I could not believe how lightweight this thing was. The bag itself is the exact same as the gen1 saddle bag except for the fill. The gen1 uses a coarse ground walnut fill weighing in at about 7lbs versus the gen2 bag being filled with a ball bearing size Styrofoam weighing in at a little under a pound. Back to the range with the gen2 bag and my fears were confirmed. With rifle stability being one of the main components of long range shooting, the gen2 bag did not hold the gun near as well because the Styrofoam does not mold in place like the crushed walnut media of the gen1.

Crosstac Shooting Bag Media


Crosstac Gen 1 Saddle BagCrosstac Gen 2 Ultralightweight Saddle Bag


I had a few of my PRS team buddies up to see what they thought about it.

Will, “It would be nice to run around with a lightweight bag but I definitely like the way the gen1 bag cradles my gun.”

Dennis, “For an older shooter, I like the gen2 saddle bag because of the weight. I would not sacrifice weight for accuracy in a match though.”

Hunter, “For the saddle bag concept as a whole, you can do a lot of different things with it. It’s nice to have lightweight gear for matches or for hunting but in a match where points are on the line, I want something that is going to be very stable. The gen1 bag is definitely the one for me.”


With that being said, everyone has their own opinions. I do like that Crosstac gives you the option to unzip the bag and put whatever fill you would like in there (including my son who likes to hide his little army men in mine). Maybe they could give you the option to order both types of fill so you could switch them out for different applications or even mix them for a happy medium of lightweight bag and great weapon stability. For me, I’m going with the gen1 Crosstac Saddle Bag. Until next time!


New ENVY Chassis by XLR Industries released

Posted in New Kit, Remington 700 on August 3rd, 2017 by KrowRN

XLR Industries has just released the ENVY Chassis for the Remington 700 Short Action. We have been impatiently waiting for these since SHOT Show this year and are very excited to have some in hand!!

ENVY Chassis by XLR

Envy Chassis by XLR Industries


Here is the press release from XLR Industries with information about the new ENVY Chassis:


For Immediate Release: August 1, 2017

XLR Announces the Release of the ENVY™ Rifle Chassis System

The highly anticipated ENVY™ offers a winning blend of features, function, and durability. It was designed specifically for those shooters who desire professional level precision.

Grand Junction, CO. – August 1, 2017.

XLR, a leading U.S. manufacturer of custom rifle chassis and components, is proud to announce the release of the ENVY™ precision rifle chassis. The feature-rich ENVY™ was developed from the ground up through years of cooperation with some of the best shooters in the world.

The ENVY™ rifle chassis has a base weight of 35 oz (without buttstock or grip) and will initially be available for the Remington 700 short action and clones. The sleek, one-piece design is constructed from rigid 6061-T6 aluminum for an ultimate balance of lightness and durability. A multi-point radial cut inlet allows the receiver to sit in the chassis stress-free for the utmost in accuracy (no V-block). As with all XLR chassis, the ENVY™ is a direct bolt-on application with no gunsmithing or setup required by the user.

Unique to the ENVY™ is the integrated, Arca-Swiss™ style 1.5” dovetail mount on the forend. This allows the chassis to be used with a camera tripod. Having the mount integrated ensures that it will never come loose during strings of fire. It also allows for a longer dovetail than a traditional bolt-on adapter would, which provides for more versatility in balancing the rifle by sliding it forward and aft.

The integrated detachable magazine system allows the use of AICS style magazines. A new style of magwell features a larger, tapered opening for faster magazine changes and has an angled, serrated face that can serve as a barricade stop. In addition, the ENVY™ also features an integrated 5.5” picatinny rail located on the bottom of the handguard as well as five strategically placed QD sling sockets. An integrated bubble level keeps cant issues in check. The M-LOK™ compatible handguard allows the shooter the option to custom-tailor the chassis with M-LOK™ accessories.

“What we have put together is the perfect package for your competitive, PRS style shooter,” said Matt Means, Sales Manager for XLR. The ENVY™ has more integrated components than any other chassis in its class. This highly anticipated product release will satisfy the needs of anyone seeking a durable and highly adaptable rifle chassis. The ENVY™ will of course come with our lifetime warranty.”

The basic ENVY™ package is priced at $740 with many upgrades and options available. The ENVY™ is available now on the company’s official online store at www.xlrindustries.com.
About XLR

XLR is a U.S. based manufacturer of world-class rifle chassis, components, and accessories. The company manufactures the renowned Element, Evolution™, Carbon, and Envy™ chassis systems for professional shooters, tactical shooters, and hobbyists alike. Using only the finest materials and state-of-the-art manufacturing processes, XLR strives to maintain its reputation for quality and tactical innovation.

Contact Information
Matt Means · Sales Manager · [email protected] · (970) 241-1807
XLR · 2323 Grand Park Drive · Grand Junction, CO · 81505

Tags: , ,

Quiver 2 Round Holder

Posted in New Kit on June 7th, 2017 by KrowRN

*Now Available*

For those times when 1 or 2 more rounds would be handy.

Quiver-ML-BLK2-64

Quiver-1913-FDE2-64


The Quiver 2 Round Holder by Hoptic USA is a low profile spare round carrier.  Made from 6061-T6 Aluminum and Type III Hard Anodized in Black or FDE. Available for .308 in KeyMod, M-LOK, and Picatinny mount options. The .308 version also fits .243, 6.5 Creedmoor, up to .30-06. Weighs in at a mere 1.5 oz (with KeyMod hardware).  Proudly Made in the USA.

KREMLIN and KRUX stocks by iota Outdoors

Posted in New Kit, Remington 700 on March 20th, 2017 by KrowRN

Now Available for Pre-Order!!

KRUX stock for Remington 700

The KRUX stock for the Remington 700 is a lightweight, low-profile composite stock perfect for a backcountry rifle build.  It weighs a mere 27 ounces and is only 28 inches in length. A carbon fiber reinforced composite mold maximizes the rifle stock’s strength under compression of a fully equipped rifle. Custom machined pillars maintain proper action and bottom metal dimensions, reducing stock fatigue and maintaining accuracy. The KRUX is hand laid for a premium quality and look and is offered in a matte texture with molded in colors and ports.  Available for the Remington 700 in Short Action or Long Action; Right or Left hand; BDL or Badger M5 inlet. Colors include: Citadel Grey, Sentinel Green, and Gobi Tan.

KREMLIN stock for Remington 700

The KREMLIN stock for the Remington 700 merges the features of both the hunter and shooter stock designs to create one multi-functional precision stock for a wide range of experiences. A composite molded rifle stock with a carbon fiber core that provides stability to any shooting stance, from the shoulder to the sandbag.  The carbon fiber reinforced composite mold maximizes the stock’s strength under compression of a fully equipped rifle. Custom machined pillars help maintain proper action and bottom metal dimensions, reducing stock fatigue. An AirTech recoil pad made from LimbSaver’s proprietary NAVCOM technology, exclusively for iota, effectively absorbs a wide range of frequencies to dissipate energy and vibration. The KREMLIN weighs 40 ounces and is 31.5 inches overall length.  Available for the Remington 700: Short or Long Action; Right or Left Hand; BDL or Badger M5 inlet. Colors include: Citadel Grey, Sentinel Green, and Gobi Tan.

Both stocks are available for PRE-ORDER with a lead time of 6-8 weeks.

AR-15 Magazine Holder by Mag Storage Solutions

Posted in AR15, New Kit on February 28th, 2014 by KrowRN


You are going to want one (or 3) of these!!


Just a simple straightforward storage solution for your 30 round AR-15 magazines.  You can mount these inside your gun safe, weapon room, or anywhere you store and organize your mags.      (Coming soon:  Neodymium Magnet Kits for installation)


Magazines snap in and out and remain securely in place.


Compatible with most .223 and 5.56 caliber magazines.  Magazine Compatibility Chart


Made in the USA!


Order here.


Mission First Tactical – MFT

Posted in AR15, New Kit, Tactical Works Home on June 19th, 2013 by KrowRN


Tactical Works, Inc. announces new dealer relationship with Mission First Tactical, MFT of Bensalem, PA.

June, 19th, 2013

DENVER, CO – Tactical Works, Inc. announced that they are now a stocking dealer for Mission First Tactical  or MFT.   A representative of  Team Tactical Works stated that they decided to offer MFT products primarily to complement the Tac21 Chassis System.  “Many operators want a folding or collapsible stock for their long range weapons platform to help with concealbility and maneuverability. MFT’s BATTLELINK Utility Stock or BUS, is a solid stock and one of the few adjustable AR15 stocks that has an adjustable cheek piece. After visiting with MFT at ShotShow 2013, we decided that we would offer most of their products to our AR15 community and as an option for the chassis systems that we offer.  The decision made sense because MFT offers a “bulletproof” solution and they are made in the USA.”

About MFT’s BATTLELINK 

As their mission states, Mission First Tactical develops select rifle/carbine accessories specifically for the Military and Law Enforcement markets.  Civilian shooters too benefit from receiving leading edge/affordable products.  The design of MFT’s accessories centers on the need for enhanced accuracy and functionality of the weapons systems improving Operator effectiveness.  MFT accessories aid in rapid target acquisition and rapid, repeatable, accurate shot sequences.  Developed and manufactured entirely in the USA.

Mission First Tactical

BUS - BATTLELINK™ Utility Stock Grey

Picture 1 of 14

Tactical Works offers MFT’s stocks, cheek pieces, and grips for the AR platform.  These accessories are also a great complement the Tac21 chassis system.

Tags: , , ,